New Feature: Set a Default Table in RocketAdmin
We're always working to make RocketAdmin more customizable and efficient for your workflow. Today, we’re excited to introduce a new feature that allows users to select a default table—so you can land exactly where you need to be when opening your RocketAdmin dashboard.
What’s New?
Previously, when you opened RocketAdmin, the system would automatically display a predefined table or the last one you accessed. Now, you have full control over which table appears first when you log in, ensuring a smoother and more tailored experience.
Why This Matters
This feature is particularly useful for users who frequently work with a specific dataset. Instead of navigating through multiple tables every time you log in, you’ll be taken straight to the one you use the most, saving time and improving efficiency.
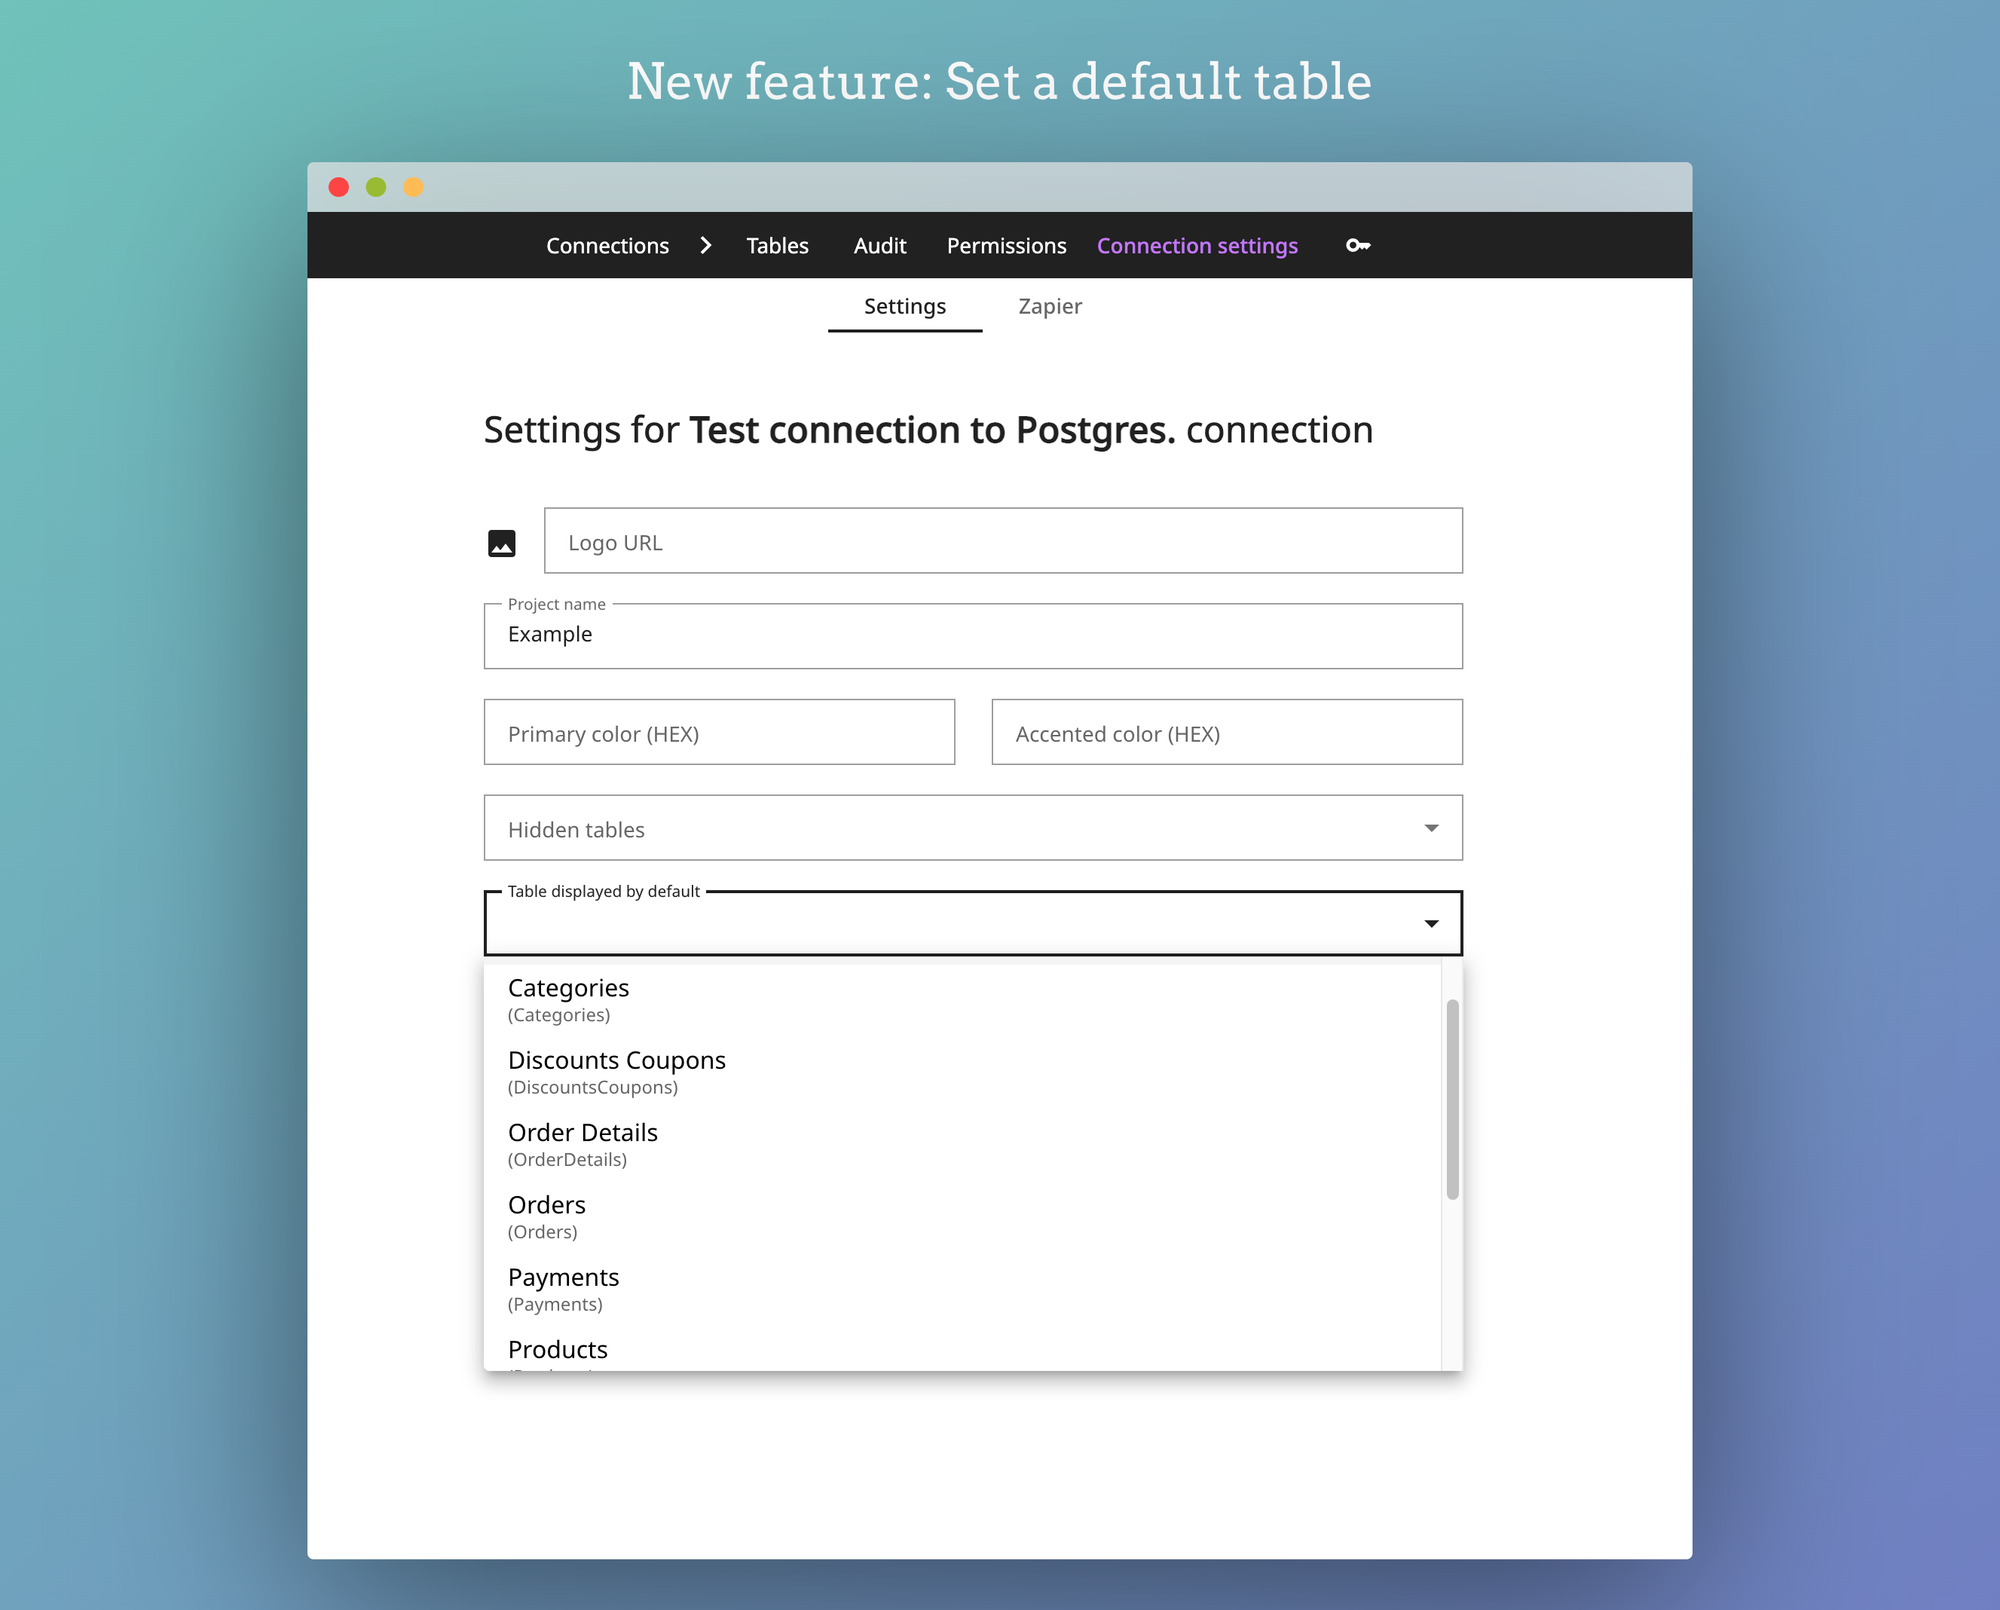
How to Set Your Default Table
Setting your default table is simple:
- Navigate to Connection settings in RocketAdmin.
- Locate the Table displayed by default selection option.
- Choose the table you want to see first when opening your dashboard.
- Save your settings, and you're all set!
Now, every time you open RocketAdmin, you’ll land on your preferred table, streamlining your workflow.
Who Benefits from This Feature?
- Admins & Analysts: Quickly access key data without extra clicks.
- Developers: Keep frequently updated tables in focus.
- Support Teams: Instantly load customer or issue-related tables.
Try It Out!
This small but impactful improvement is now available in RocketAdmin. Try it out today and let us know what you think! Your feedback helps us continue enhancing the platform to meet your needs.
Stay tuned for more updates, and happy managing with RocketAdmin!